Troubleshooting Microphone and Camera Permissions in Desktop Apps is a common hurdle when you are trying to jump into a video call or record audio for a project. These security layers are designed to protect your privacy, yet they often block legitimate tools from functioning correctly. By mastering the settings within your operating system, you can quickly restore access to your hardware without compromising your digital safety.
This guide walks you through the steps to identify, diagnose, and resolve access issues, ensuring your devices work exactly when you need them to. You will learn how to verify system-level blocks and application-specific settings to get back to work immediately.
Checking Operating System Settings for Hardware Access
The first place to look when your hardware isn’t responding is the central hub of your computer. Both Windows and macOS maintain a strict privacy dashboard that acts as a gatekeeper for your peripherals. If the operating system itself has disabled the hardware, no amount of tweaking within an individual app will fix the problem.
For Windows users, open the Windows Settings menu and navigate to the Privacy & Security section. Here, you will find dedicated tabs for Camera and Microphone. Ensure that the master toggle for “Camera access” or “Microphone access” is turned on.
If this master switch is off, the entire system is effectively blind and deaf to the requests made by your installed software. It is a common mistake to overlook this global switch while focusing solely on the individual application settings.
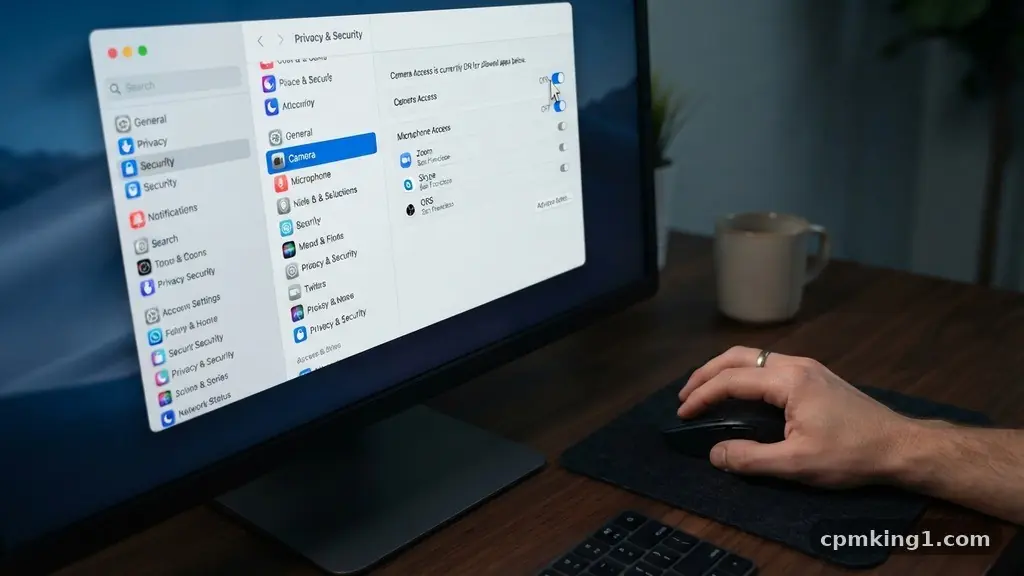
On a Mac, the process involves visiting System Settings and looking for the Privacy & Security panel. Within this menu, you will see a list of categories including Camera and Microphone. Clicking on these will reveal a list of applications that have requested access.
You must ensure the toggle next to your specific app is enabled. If the app isn’t listed, it means it hasn’t yet requested permission, or the request was blocked previously. Always verify these system-level permissions before digging into more complex software configurations or hardware drivers.
Verifying Application Permission Toggles
Once you have confirmed that the operating system is allowing hardware access in general, you must look at the specific application permission toggles. Many modern desktop apps are modular, meaning they request access to hardware only when a specific feature is triggered. If you accidentally clicked “Deny” when the app first launched, that setting is often cached and remembered permanently by the OS.
To resolve this, go back to your privacy settings in either Windows or macOS. Look specifically for the list of apps that have requested access to your camera or microphone. If your application appears in the list but the toggle is set to off, flip it to the on position.
Sometimes, you may need to restart the application for the change to take effect. This is a classic step in troubleshooting Microphone and Camera Permissions in Desktop Apps that catches many users off guard.
If the app is not in the list, try to trigger the permission request again. Close the application, relaunch it, and immediately attempt to use the feature that requires the camera or microphone. This often forces the operating system to display the permission prompt once more.
If the prompt fails to appear, the issue might lie with the application’s internal code or a corrupted configuration file. In such cases, checking the developer’s support documentation is a smart move.
Updating Hardware Drivers for Stability
Sometimes, the issue isn’t about permissions at all, but rather the bridge between your hardware and the operating system. If your camera or microphone is not being recognized by any software, your hardware drivers might be outdated or corrupted.
The operating system relies on these drivers to communicate with your physical device. If they are missing or malfunctioning, the system will report that no device is found, regardless of your permission settings.
In Windows, right-click the Start button and select Device Manager. Expand the categories for “Cameras” or “Audio inputs and outputs.” If you see a yellow warning icon next to your device, it is a clear sign of a driver conflict.
Right-click the device and select “Update driver.” You can choose to search automatically, which allows Windows to find the latest verified software for your specific hardware component.
For Mac users, hardware drivers are managed through the system update process. Keeping your macOS up to date ensures that all internal components have the latest support files. If you are using an external webcam or USB microphone, visit the manufacturer’s website to download the latest firmware.
A quick trip to the official Apple Support site can help you confirm if your specific model requires additional software to function correctly on newer versions of the operating system. Never ignore a pending software update, as these often contain critical security patches that resolve hardware communication bugs.
Managing Browser-Based Permissions and Conflicts
Many desktop apps today are actually web-based wrappers, meaning they run on a browser engine. If you are using a tool like Slack, Discord, or a web-conferencing app, you might be dealing with browser-based permissions rather than standard desktop settings. Browsers like Chrome, Edge, and Firefox have their own internal permission managers that operate independently of your OS settings.
When you open a web-based app, look for a small icon in the address bar—usually a lock or a camera symbol. Clicking this will reveal whether the site is allowed to use your microphone or camera.
If it says “Blocked,” you need to change this setting to “Allow” and refresh the page. This is a common point of failure for users who are confused about why their browser-based app isn’t picking up their audio.
Another common mistake is having multiple browser tabs open that are competing for the same hardware. If one tab has already claimed the microphone, the second tab might be blocked or show an error. Always close unnecessary tabs or browser windows before starting a call.
If you are still having trouble, clear your browser’s site-specific cache. This removes any potentially corrupted permission data that might be preventing the app from functioning as intended.
Handling Administrative Privileges and Security Protocols
Security protocols on modern operating systems are increasingly strict. Sometimes, an application lacks the necessary administrative privileges to access hardware components because it was launched in a restricted user mode.
If you are running an app that requires high-level access, try closing it completely and right-clicking the icon to select “Run as administrator.” This can grant the app the elevated permissions it needs to bypass certain OS-level blocks.
However, be cautious with this approach. Only run software as an administrator if you trust the source completely. If the app still refuses to access your hardware, check your third-party security software.
Antivirus suites and firewall programs often have their own “privacy shield” or “webcam protection” features. These tools can silently block microphone input or webcam access to prevent malicious spying.
Check the settings within your security suite to see if there is an “Application Control” or “Privacy” section. You might find that your video conferencing tool has been added to a block list by the antivirus software.
Whitelisting the application within your security software is often the final step in resolving persistent access issues. Always remember that these security protocols are there to protect you, so ensure you only grant access to software you genuinely use and trust.
Performing a Full Process Termination
When an application hangs, it can leave the camera or microphone in a “busy” state. This happens when the process doesn’t release the hardware lock even after you close the window.
The hardware remains “in use” by a ghost process, preventing any other app from accessing it. You can resolve this by performing a full process termination to clear the lock.
On Windows, use Task Manager to find the application in the list of running processes. Right-click the app and select “End task.”
On macOS, use the Activity Monitor to find the process and click the “X” button at the top to force it to quit. This effectively kills any lingering background activity that might be holding onto your camera or microphone.
After terminating the process, wait about ten seconds before restarting the app. This gives the operating system time to fully release the hardware resources and reset the connection.
If you immediately try to relaunch the app, the system might still be in the middle of closing the previous instance, leading to the same error. A clean restart is often all it takes to get things back on track.
Troubleshooting Hardware Connections and Cables
Finally, never overlook the physical layer of the connection. If your microphone or camera is external, the cable might be loose, or the USB port might be faulty.
A damaged cable can cause intermittent drops, which the operating system interprets as a hardware failure. Try unplugging the device and plugging it into a different port, preferably one directly on the motherboard rather than a USB hub.
USB hubs are notorious for providing insufficient power to high-drain devices like webcams. If your camera keeps disconnecting, it might be starving for power.
Moving the device to a dedicated port on your computer tower or laptop can resolve this instantly. Additionally, check the cable for any visible frays or kinks.
If you are using a wireless device, ensure the Bluetooth connection is stable and the battery is charged. Low battery levels can often cause hardware to enter a power-saving mode where it stops responding to software requests.
By ruling out these physical factors, you ensure that your troubleshooting efforts are focused on the right area. Once you verify the physical hardware is sound, you can confidently return to the software settings to finish the job.
Frequently Asked Questions
Why does my camera show a black screen even when permissions are allowed?
A black screen often indicates that the camera is being used by another application. Ensure that no other video software, such as Skype, Zoom, or a browser tab, is currently accessing the camera. Additionally, check if there is a physical privacy shutter on your webcam that might be closed.
Can my antivirus software block my microphone?
Yes, modern antivirus programs often include privacy features that block unauthorized access to microphones and cameras. Check the settings or the dashboard of your security software to see if your application is being blocked or if “Webcam Protection” is enabled.
What should I do if my microphone is detected but the volume is silent?
First, check the input level in your system sound settings to ensure the microphone isn’t muted or set to zero gain. If the level is fine, the issue might be an incorrect input device selection within the app itself. Ensure the app is pointing to the correct hardware device rather than a virtual driver or a disabled port.
How do I know if an app is currently using my camera?
Most modern operating systems provide a visual indicator. On Windows, a small camera icon appears in the system tray when the camera is active. On macOS, a green LED light next to the camera lens turns on, and a small orange dot often appears in the menu bar to notify you that hardware is in use.
Will updating my operating system reset my privacy settings?
Usually, major system updates preserve your existing privacy settings. However, it is always a good idea to double-check your permissions after a significant OS update, as new security features or changed menu structures might affect how your apps interact with your hardware.
Conclusion
Troubleshooting Microphone and Camera Permissions in Desktop Apps is a manageable task once you understand how your system manages hardware security. By systematically checking your operating system settings, verifying application access, and ensuring your drivers and physical connections are sound, you can resolve almost any issue.
Remember to always look at the global privacy dashboard first before diving into specific software configurations. If a process seems stuck, a clean restart is often the most effective way to clear hardware locks.
Maintaining control over your privacy settings is a vital part of digital hygiene. By keeping your software updated and remaining aware of which applications have access to your devices, you stay in the driver’s seat of your computing experience.
If you still encounter persistent problems after following these steps, do not hesitate to reach out to the specific software developer’s support team for further assistance. Happy computing and enjoy your seamless video and audio experiences.